Ato 3 Area /16
Ato 3 Missão /14
Text Audio /18
| Type | Nome | Quantidade |
|---|---|---|
| Act 3 | Pichação Antiga | 6 |
| Act 3 | Caderno Antigo | 1 |
| Act 3 | Clarissa | 48 |
| Act 3 | Grigor | 37 |
| Act 3 | Hargan | 64 |
| Act 3 | Nota do Diário | 1 |
| Act 3 | Senhora Dialla | 66 |
| Act 3 | Carta para Chitus | 1 |
| Act 3 | Diário do Malachai | 1 |
| Act 3 | Maramoa | 82 |
| Act 3 | Dispositivo de Devaneio | 1 |
| Act 3 | Siosa | 31 |
| Act 3 | Os Antigos | 7 |
| Act 3 | As Crônicas da Pureza | 6 |
| Act 3 | Tolman | 1 |
| Act 3 | Textos do Victario | 4 |
| Act 3 | Dominus | 10 |
| Act 3 | Gravicius | 11 |
Community Wiki
Act 3
Act. 3 (about 35 minutes with minimal practice)
Head up to Clarissa in "The City of Sarn ", kill the guard dude and while you wait for Clarissa, kill monsters around for more exp.
Continue to "The Sarn Encampment " and head over straight to "The Slums", there's no reason to walk all the way in town.
Do your best to find the set of stairs, this will lead you one of the sides of the zone where you will find entrance to "The Crematorium"



Grab "The Crematorium " waypoint in case of a DC or crash or whatever. In there you have two objectives. Find and Kill Piety and complete your Trial of Ascendancy
DON'T FORGET TO CLICK THE STRANGE DEVICE AND TO GRAB THE QUEST ITEM AFTER PIETY




Once you have completed both objectives, log out and talk to Clarissa for the key to "The Sewers " and head over there.
In "The Sewers ", there will always be a Bust in the first part (before the waypoint) and two more after the waypoint. Make sure to grab the waypoint since you will be coming back here!

IF YOU SEE A "T" SHAPE THING RIGHT AFTER THE WAYPOINT GO FORWARD

IF YOU DON'T SEE THE "T" SHAPE, GO RIGHT AND GO UP WHENEVER YOU CAN

Once you have all 3 Busts, go forward until you find the entrace to "The Marketplace "
In "The Marketplace “ find the waypoint and very close to it, you will find the entrance to "The Catacombs ", head in there.





Find the Trial of Ascendancy and log out, there's nothing else to do here.
In town, talk to Hargan to get your skill point quest and to Maramoa to get your first curse, which will be very useful for single target damage in the upcoming fights
Head back over to "The Marketplace " waypoint and find your way to "The Battlefront ", I typically just go right from the waypoint until I hit a wall
and then I follow the wall until I find the entrance.Find the waypoint in "The Battlefront " as we will need it later when we come back. Head down the waypoint and grab the Quest item for "The Ribbon Spool" in the chest.


a. If you are around level 25 (minimum high % lvl 24), head straight left from the waypoint all the way up to "The Docks", I typically FULL CLEAR this zone since it is AMAZING EXP.
Find the quest item at one of the pier ends and logout.


b. If you are underleveled somehow (meaning 23 or early level 24), head straight up from the waypoint until you find the entrance to "Solaris Temple"
a. If you went to "The Docks" first and have the quest item, head back to ""The Battlefront"waypoint and head straight up towards "The Solaris Temple Level 1". Make your way to the end of "The Solaris Temple Level 2 " and turn in both quest items. This is good time to fix needed attributes via a Str / Dex / Int amulet, if your character doesn't need any grab the Gold amulet for extra rarity!


b. Make your way to the end of "The Solaris Temple Level 2" and grab the waypoint and head back to "The Battlefront" waypoint. Go straight left until you find the entrance to "The Docks" Fullclear that zone since it is amazing exp and find the quest item at the end of one of the piers and finally log out.
Take the waypoint to "The Solaris Temple Level 2" and turn in both quest items. This is good time to fix needed attributes via a Str / Dex / Int amulet, if your character doesn't need any grab the Gold amulet for extra rarity!

Take a waypoint back over to "The Sewers " and break down the wall thingy. Keep going forward until you reach "The Ebony Barracks", right next to the entrace, grab the waypoint.
Continue all the way up until you find General Gravicious and kill him, this will unlock the lvl 28 gems most builds will use for the rest of the game.
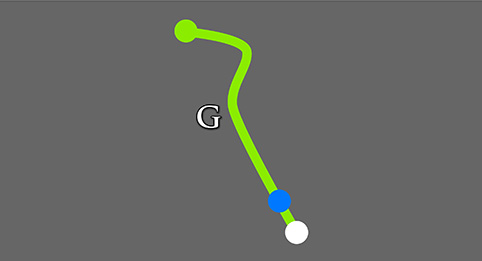

Continue forward until you find the entrance to "The Lunaris Temple Level 1" and follow the red carpet until you reach the end of the zone. Grab the waypoint in case of a DC / Crash before
you head into "The Lunaris Temple Level 2"

Make your way to Piety (fire resistance is incredibly important in this zone to live through the volley of projectiles from the lady monster things) and kill her, log out.
DON'T FORGET TO PICK UP THE KEY!!

Grab your lvl 28 "main skill" gem from Maramoa if necessary, otherwise head back to "The Ebony Barracks" waypoint and go up a bit and then straight right.
This will lead you to "The Imperial Gardens".Follow the Road until you find the waypoint, if you go straight left to the end of the road, it will lead you to "The Library" if you need to complete it for any gems.
If you go straight right (or forward if the road leads forward) this will lead you to the big door into "The Sceptre of God".
You can go straight to "The Sceptre of God" and come back for the Trial of Ascendancy later, as it's kind of off to the side in between the big door and the entrance to The Library " You can also just complete the trial first and head over to "The Sceptre of God" afterwards if you happen to find it first.
Make your way up "The Sceptre of God", this layout is like a box, a round box, the exit is ALWAYS in one of the corners for every floor.
Find your way up to Dominus and kill him, head over into Act 4 if you have your Trial of Ascendancy, otherwise log out and take the waypoint back to "The Imperial Gardens" find your Trial, complete it and log out.
Wikis Content is available under CC BY-NC-SA 3.0 unless otherwise noted.