Act 2 Area /17
Act 2 Quest /16
Text Audio /19
| Type | Name | Quantity |
|---|---|---|
| Act 2 | Alira | 18 |
| Act 2 | Ancient Reverie Device | 1 |
| Act 2 | Arteri's Letter | 1 |
| Act 2 | Definitely Oak | |
| Act 2 | Eramir | 75 |
| Act 2 | Etchings on Wood I | 1 |
| Act 2 | Etchings on Wood II | 1 |
| Act 2 | Etchings on Wood III | 1 |
| Act 2 | Etchings on Wood IV | 1 |
| Act 2 | Greust | 45 |
| Act 2 | Helena | 84 |
| Act 2 | Inscription | 6 |
| Act 2 | Kraityn | 18 |
| Act 2 | Oak | 18 |
| Act 2 | Plaque | 5 |
| Act 2 | Proclamation | 1 |
| Act 2 | Silk | 41 |
| Act 2 | Transmutia Device | 1 |
| Act 2 | Yeena | 73 |
Community Wiki
Act 2
Act. 2 (about 35 minutes with minimal practice) - This act seems much longer than it is. There's lots of steps but they are short!
Make your way through "The Southern Forest" up to "The Forest Encampment"
Vendor anything you don't need to Greust and head to the RIGHT side - "The Old Fields"
Find the entrance to "The Den " and OPEN A PORTAL once again
Keep going through "The Old Fields" into "The Crossroads" and follow the road up to the waypoint
Take that waypoint back to town and into your portal, enter "The Den " and find the mini-boss, kill him and Log out.
Talk to Yeena and grab your 2nd quicksilver. Identify it and Equip it. Try to be as efficient as possible by clicking one and the other when the duration expires. The difference between good and bad quicksilver uptime during the leveling process is INSANE.
Take your waypoint back to "The Crossroads" and head TOP LEFT, this will lead you to "The Chamber of Sins Level 1".
Once in "The Chamber of Sins Level 1", head over to the middle part and grab the waypoint (this isn't necessary but in case of a crash or DC, it's very nice to have!)


From the waypoint, head in the direction of the hallway which the waypoint points towards, this will always be the Exit

In "The Chamber of Sins Level 2" find the Trial of Ascendancy, complete it and then find the end of the zone leading to the mini-boss Fidelitas, the Mourning.

Kill Fidelitas and Log out DON'T FORGET TO CLICK THE STRANGE DEVICE AND TO PICK UP THE GEM
Talk to Greust and Grab your first Herald / Aura or whatever your build will use. Talk to Yeena and buy the 2nd one (if your build will be using two)
Take your waypoint back to "The Crossroads" and head DOWN RIGHT, this will lead to "The Fellshrine Ruins"
Follow along the road of "The Fellshrine Ruins " until you find "The Crypt Level 1"
In "The Crypt Level 1", your only goal is to complete the Trial of Ascendancy, you can Logout afterwards
Back in town, we are headhing LEFT now, over to "The Riverways".
Follow the road until you find the waypoint (note that any movement ability WILL cross the gap in missing pieces on the road! Don't waste your time going around!)
Once you have the waypoint, keep following the road until you reach "The Western Forest"
In the Western Forest, follow the road once more until you find the waypoint.
Once you found the waypoint, head ACROSS the road from the waypoint and this will lead you to "The Weaver's Chambers"

Make your way to the Weaver and Kill her (MUCH easier at lvl 16 once you can equip your Aura / Herald / etc) and log out DON'T FORGET TO PICK UP HER LIL SPIKE THINGY



Back in town, talk to Silk for your support gem (reward) and head back to "The Crossroads "waypoint
Head straight forward from the waypoint over to "The Broken Bridge", kill Kraitlyn (you pretty much never help this guy) and log out DON'T FORGET TO PICK UP HIS AMULET
Take your waypoint back to "The Riverways" and look for a pavement road, it's ALWAYS near the waypoint.
Follow this road (see on image) and this will lead you to "The Wetlands".

Find "Oak" and kill him (we pretty much never help Oak either) DON'T FORGET TO PICK UP HIS AMULET


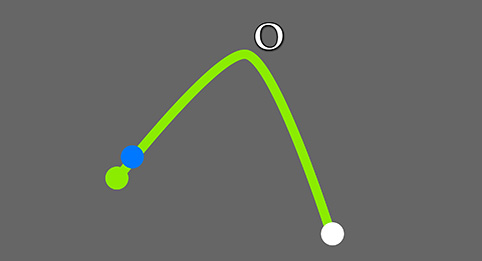
Head out of his camp and find the waypoint in "The Wetlands"
Take this waypoint back to "The Western Forest" and head down the road to the very bottom
Kill the guard and put the seal back in place
Head back up on the road until you once again find a pavement road like before.

Follow this road all the way to Alira
If your build kills Alira, do so, otherwise grab the Apex and logout
Go back to Act one and talk to Bestel for your next skill point, then take your waypoint to "The Wetlands"
Click the roots and head over into the "The Vaal Ruins" .... This layout SUCKS BUT the vast majority of the time it will be shaped like an S, otherwise it will be shaped like a U



Struggle for 2 hours and half and finally find the ball! Click the ball and head forward into the "The Northern Forest "
Make your way through all the way up to "The Caverns"
Enter "The Caverns" and go through all the way up to the waypoint. Grab it in case of a DC or something.




Struggle for another 2 hours trying to find the entrance to the "The Ancient Pyramid ".... Again this layout is AWEFUL BUT the entrance will ALWAYS be in one of the three corners.
Make your way up "The Ancient Pyramid " the first floor is random and the exit will always be in one of the three corners
After the first floor of "The Ancient Pyramid ", the next 2 floors are easy. The exit will ALWAYS be across the starting point entrance.
Reach Vaal Oversoul and open a portal back to town.
This is a GREAT moment to do your wand craft recipe or physical weapon recipe This boss is a joke with good damage!
Wand Recipe: Magic Wand +
 Orb of Alteration + RARE Topaz Ring/Ruby Ring/Sapphire Ring
(HIGHLY RECOMMEND GOING WITH TOPAZ)
USE AN ESSENCE TO TURN A TOPAZ RARE (don't waste an Orb of Alchemy)
IF YOU DON'T HAVE A TOPAZ, MAKE ONE
Ring Recipe: Iron Ring + Skill Gem of Any Color
Topaz = Green Gem, Sapphire = Blue Gem and Ruby = Red GemPhysical Weapon Recipe: Weapon +
 Blacksmith's Whetstone + RARE Rustic Sash
USE AN ESSENCE TO MAKE THE RUSTIC SASH RARE
If you haven't found a Rustic Sash, buy one from the Vendor (Nessa or Yeena)Head back in your portal, nuke the boss and logout!
Wikis Content is available under CC BY-NC-SA 3.0 unless otherwise noted.


