第4章 Area /12
| 名前 | レベル | ボス |
|---|---|---|
| ハイゲート | 40 | |
| 水道橋 | 33 | 百足の影 · 大渦 |
| 干上がった湖 | 34 | 浄化の皇帝、ヴォール · ナイトウェイン · 編まれた恐怖 |
| 鉱山 -第一層- 鉱山 -第二層- | 34 35 | パイクリベット · 穴の開いたゴライアス · トンネラー · ヴォイドスクリーム ハンマーストーム · ヴォイドスクリーム · 穴の開いたゴライアス · トンネラー · パイクリベット · バーニングマン |
| 水晶鉱脈 | 36 | バーニングマン · 穴の開いたベヒモス · バーロワー · ハンマーストーム |
| カオムの夢 | 37 | トーチオーク・グローブ · トリスケリアキ · ヴォルカニックゴーレム · ラカンゴ · ヴァカリトーテム |
| カオムの要塞 | 38 | カオム王 · ヴァカリトーテム · ヴォルカニックゴーレム · ラカンゴ |
| ダレッソの夢 | 37 | バークフル · アイペッカー · スティールチャウ |
| 大闘技場 | 38 | 剣の王、ダレッソ · ルディアリウス・フェリックス · メヴィオン · ディマチャエリ・カシウス · 氷の顕現 |
| 魔獣の内部 -第一層- 魔獣の内部 -第二層- | 38 39 | ボーン・クイーン · スティギアンレヴナント · 目を産む者 唾棄すべき姿、パイエティ · スティギアンレヴナント · 目を産む者 |
| 摘出 | 40 | 悪夢、マラカイ · 悪夢、マラカイ · ドードリ・ダークタン · 審問官、マリガロ · アンブラのシャヴロン · スティギアンレヴナント · 目を産む者 |
| 頂への道 | 40 | 白い死 |
第4章 クエスト /11
Community Wiki
Act 4
Act. 4 (around 35 minutes including normal lab)
Go through "The Aqueduct" and make your way to town.
In town, go straight left to "The Dried Lake".
This is a great zone to get a lot of experience so feel free to full clear it if you are more than 2 levels behind the zone level.



Once we have the banner from killing the mini-boss Voll, go straight to "The Mines Level 1" until you reach "The Mines Level 2"。


In "The Mines Level 2", there is a skill point quest from freeing the spirit of Deshret, you must find this before proceeding.
IF you happen to find the exit to "The Crystal Veins" before you find the quest, open up a portal at the entrance and keep going.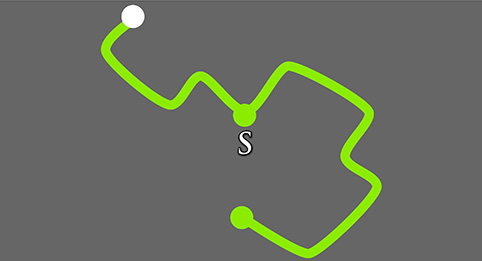



Make your way through "The Crystal Veins" until you reach the waypoint. IF you haven't gotten the Spirit of Deshret yet, take the waypoint back to town and enter your portal, find the Spirit.



It's time to run your FIRST Lab! You should be somewhere around level 32-34 or so. Talk to Tasuni for your skill point and then take the waypoint back to Act 3 and walk up to the lab. Remember to click the waypoint in the Plaza so you can always come back.
Before you start your lab, check out PoeLab for the Lab layout. Normal Lab is ALWAYS the same layout pretty much, but get accustomed to poelab either way.
After Lab, head back to "The Crystal Veins" and go Right into "Daresso's Dream"
Make your way through that zone until you reach "The Grand Arena", take the waypoint in that zone back to The Crystal Veins".
This time go Left into "Kaom's Dream" and make your way through both levels and up to Kaoms, kill him and log out.
DON'T FORGET TO PICK UP THE QUEST ITEM

Take the waypoint from Town back to "The Grand Arena" and make your way to Daresso, kill him and log out.
DON'T FORGET TO PICK UP THE QUEST ITEMThe Reason why we do Half of Daresso, followed by Koams entirely and back to Daressos is to try to maximise exp gain by running both lower level zone in a row
followed by both the higher level zones. This can give up an additional level to kill both bosses which can make it easier.Head back to "The Crystal Veins " and into "The Belly of the Beast Level 1", struggle for however long until you make your way up to Piety. Kill her and go forward to "The Harvest"
Not much to say about "The Belly of the Beast Level 1", it's filled with dead ends and an overall aweful zone for experience as well. A "Sealing" flask helps A LOT in this zone because all the puncture mobs will cause bleeds which do more damage to you as you move.
Such flask isn't NECESSARY at all and I wouldn't waste ressources trying to roll one, but if you are absolutely struggling, head over to your menagerie
and craft on "Sealing" with 4 random rare beasts. Most of your flasks at that point in time will be replaced later so it's a bit of a waste.



The Belly of the Beast Level 2



In "The Harvest ", kill all three bosses (always one on the Right side and two on the Left side) and finally Malachai, The Nightmare, then log out.
In town, talk to Dialla and Oyun for your rewards, this is where you unlock the last set of "endgame gems" such as Spell Echo Support or Greater Multiple Projectiles Support .

Wikis Content is available under CC BY-NC-SA 3.0 unless otherwise noted.